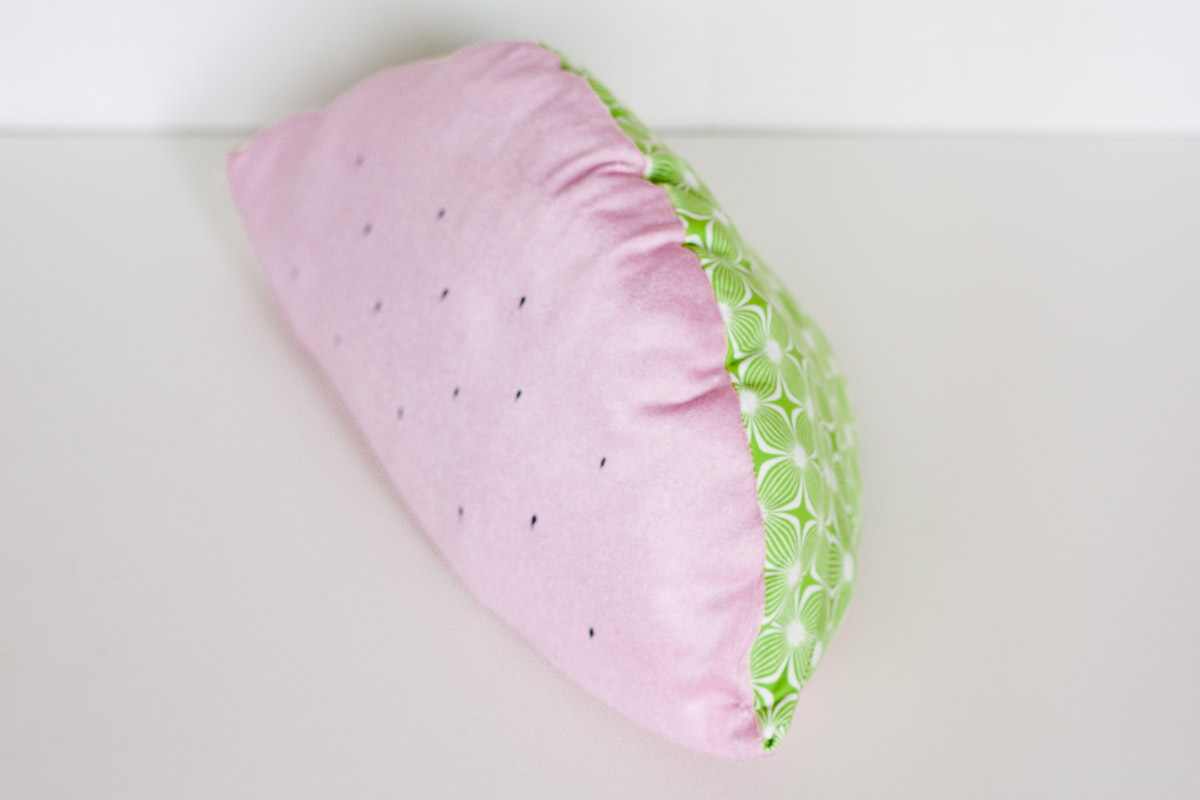
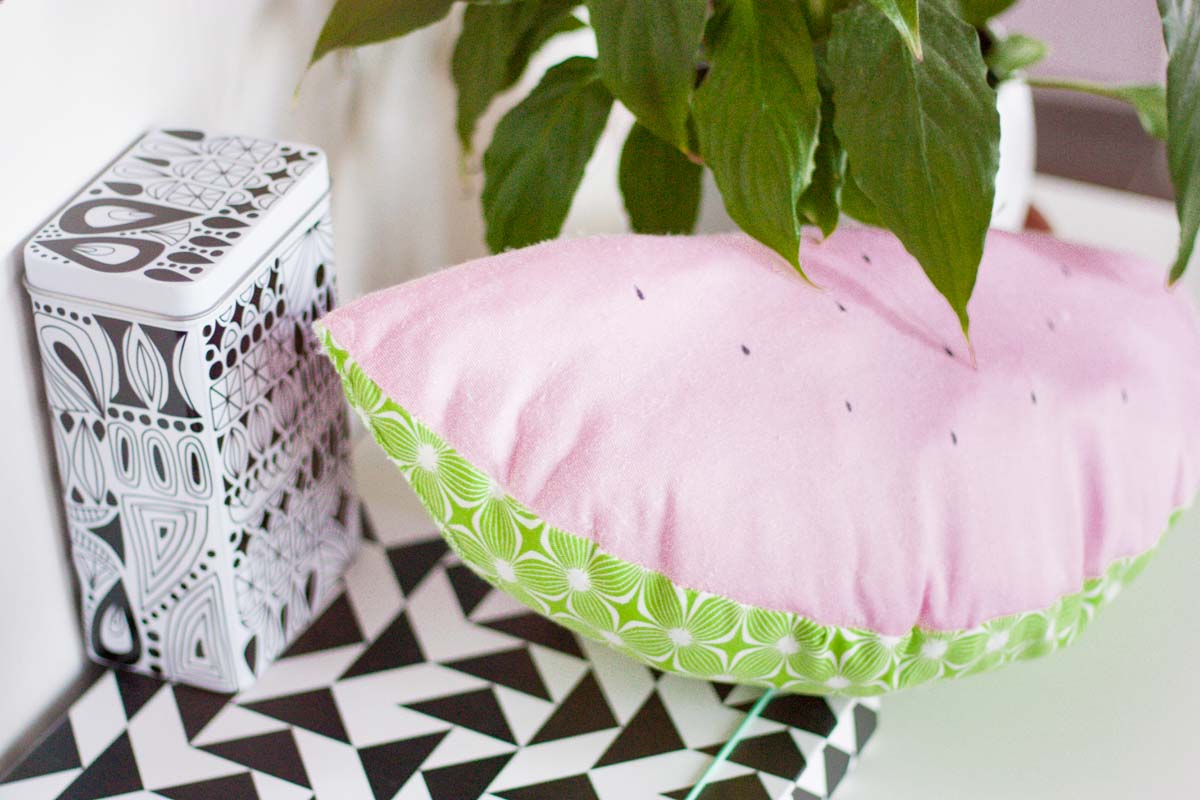
How To Make A Watermelon Throw Pillow
Summertime is magic, everything is more colorful, more cheerful and there'south a general joyful temper everywhere you go; let's bring these positive vibes also into our abode decor with this beautiful and comfortable Watermelon Throw Cushion. Don't become scared by its complex shape, it's actually easier than you remember if you follow advisedly each step. A little sewing skills are required, every bit much as it concerns using a sewing motorcar and making a rough hand seam: that's all the expertise needed.
On one mitt, with its half moon shape, this pillow can be used as neck sustain at home or during long trips: place it behind the cervix and fall asleep right away. On the other hand, it helps to add some colorful design at home, perhaps complementing information technology with some more regular squared pillows. Mix and match textiles to obtain the desired upshot: if your home is neutral toned go for a pale pink and a white and greenish pattern similar this one, instead if you tend to use more than saturated colors at habitation go ahead and use a strong fuchsia and a total color design. Watermelons accept never been and so versatile!
Read on and detect with the states how to brand this unique Watermelon Throw Pillow and decorate your living room with juicy colour and pattern.
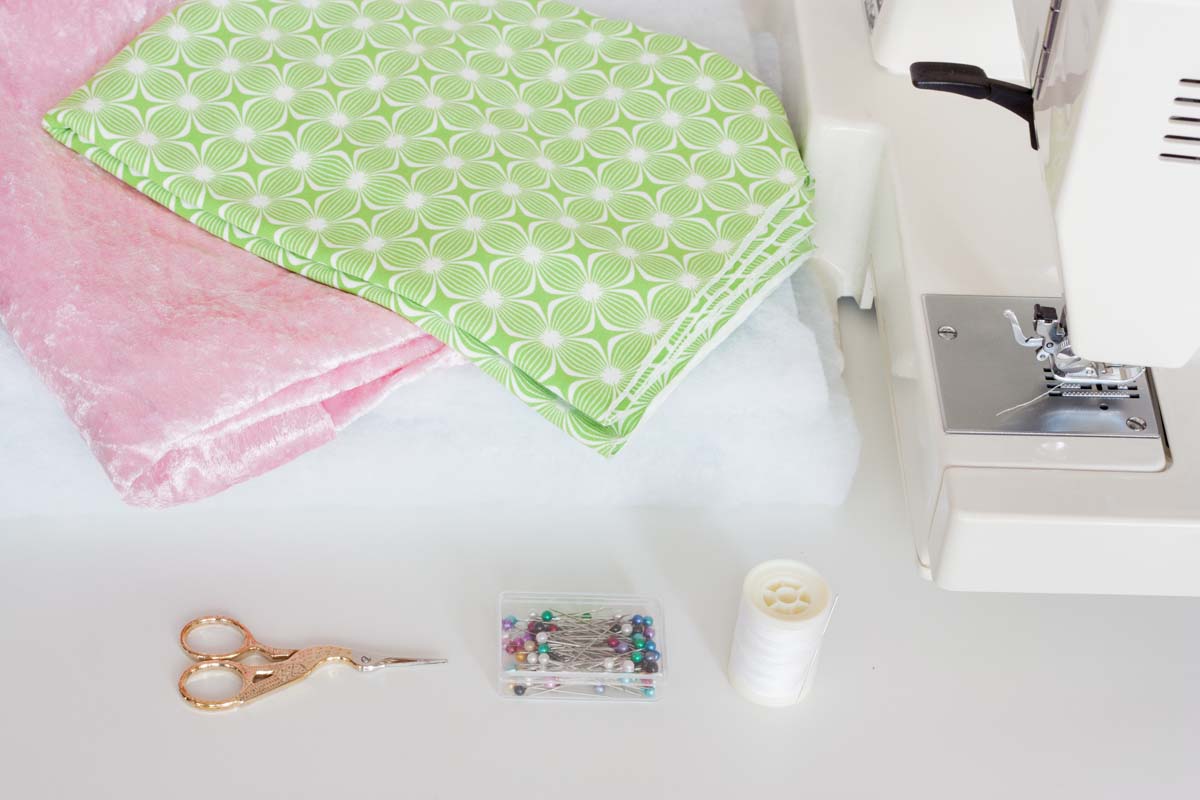
Supplies:
- pinkish and green patterned material
- sewing car
- pair of scissors
- thread
- pins
- pencil
- needle
- stuffing
- black permanent marker
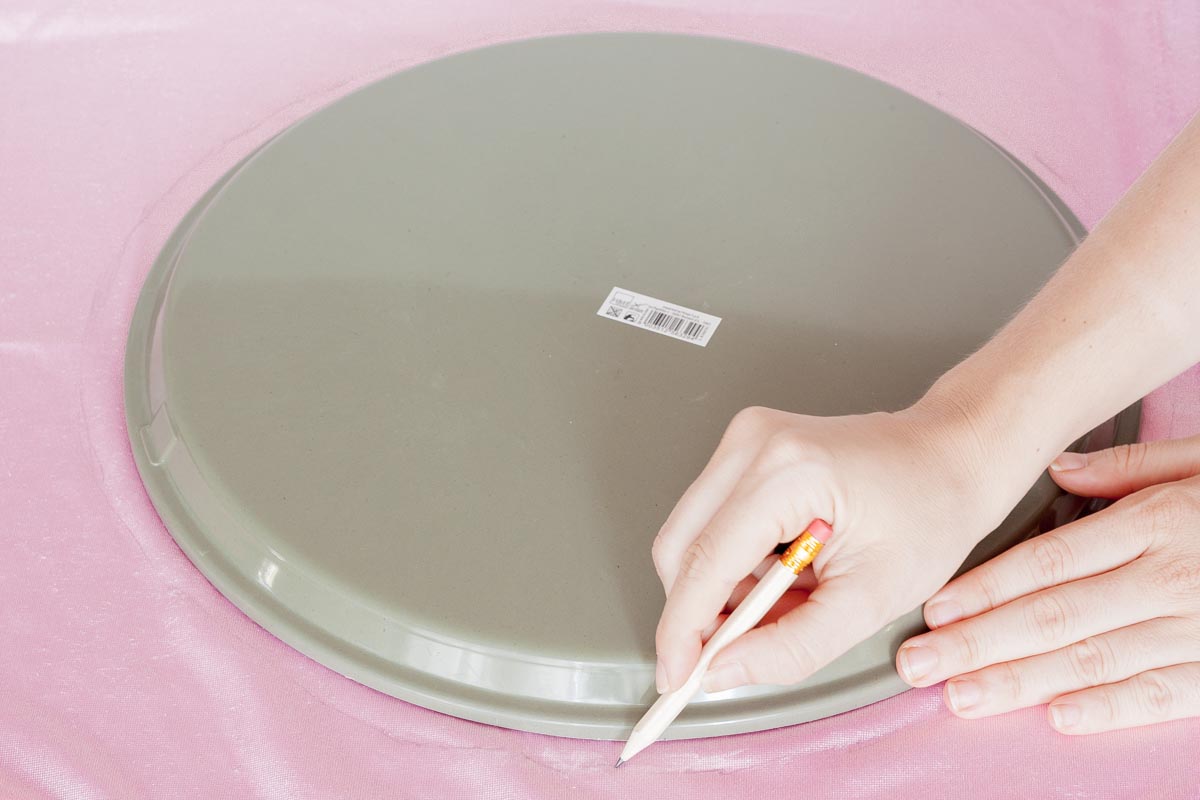
1. Start by using a round object (a tray in my instance) to trace a circle on the pink textile. Bend information technology in half, secure with some pins and cutting the round shape so it comes out perfectly symmetrical.
two. At present employ your bent circle to depict a half moon on the back of the green textile. Freehand shut the inner line of the one-half moon. Once again, bend in one-half by length and cut the shape so that left and right parts come up out symmetrical. Repeat this step to make another half moon.
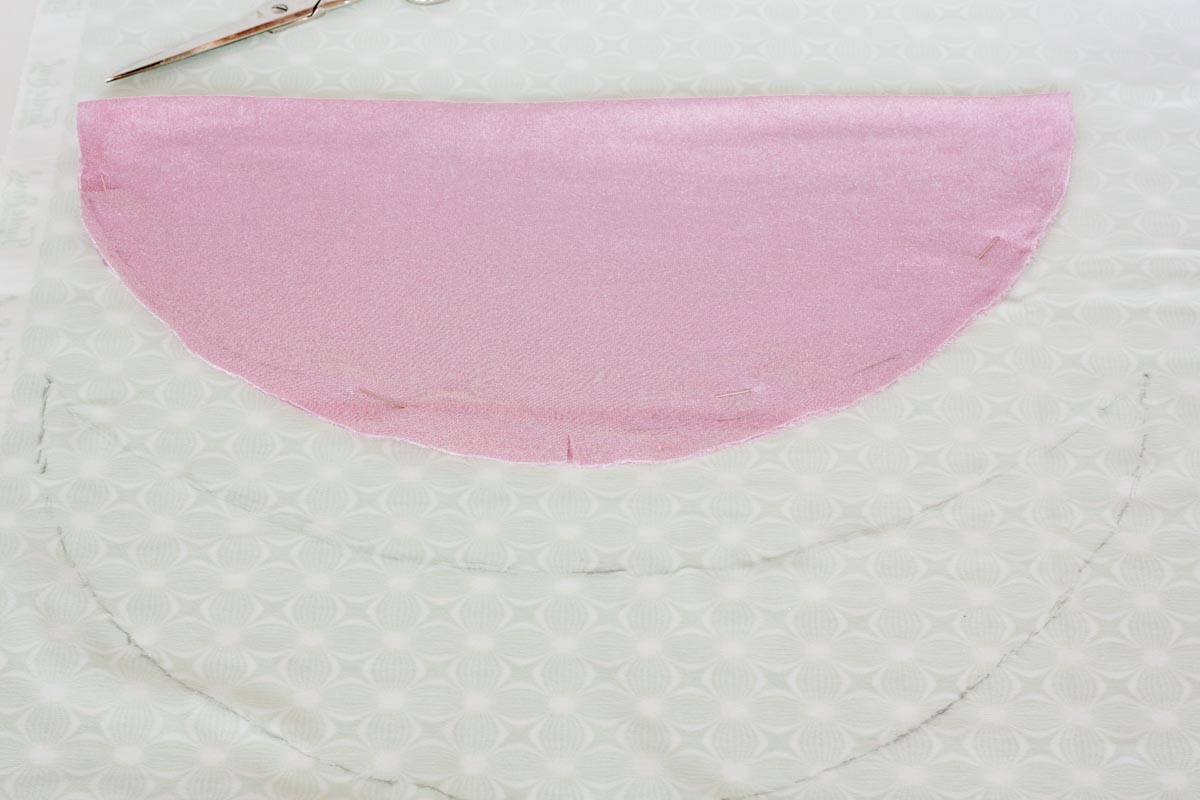
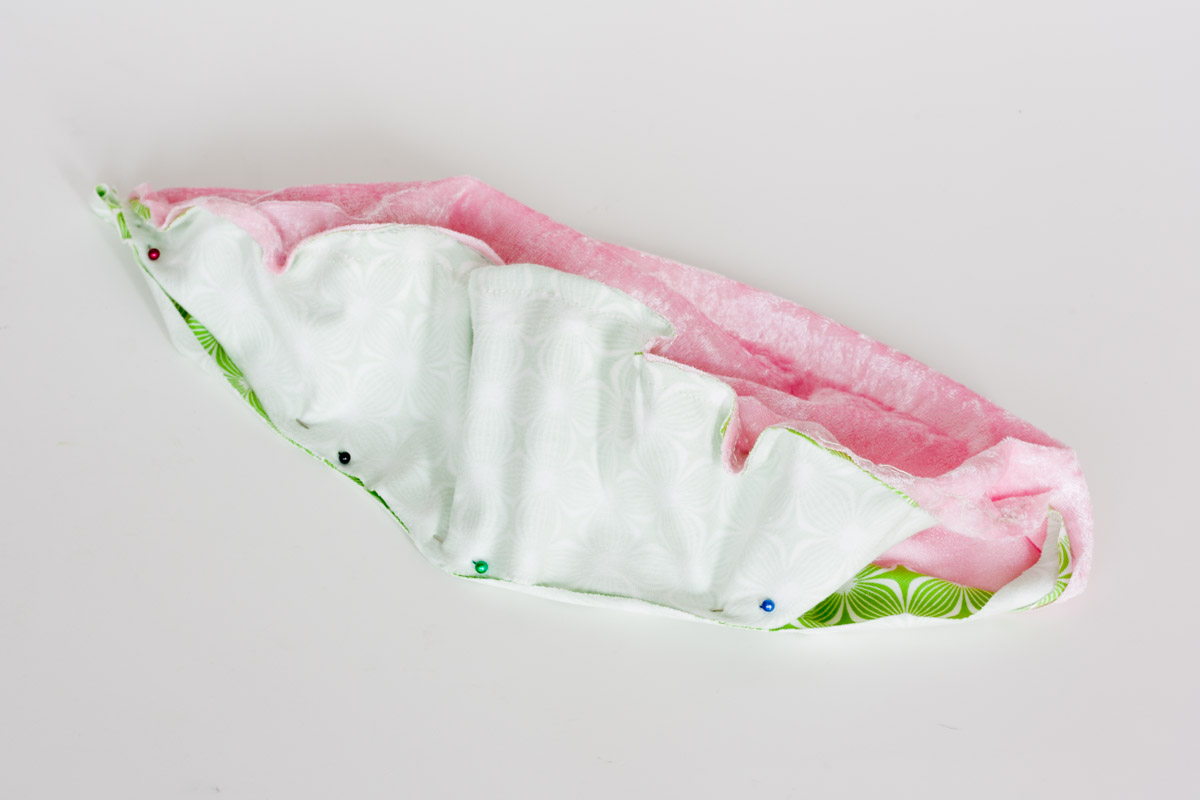
3. Next, pin your half moons to the pink circle, wrong ways facing exterior. At present use the sewing machine to stitch the whole perimeter where the pins are.

four. In this step we're going to nearly close the slice, so pull away the pink material so that the two green parts tin lay on each other like shown in the movie. Join them together and then sew where the pins are. Retrieve to stop sewing before you reach the other end then that we'll be able to stuff the pillow.
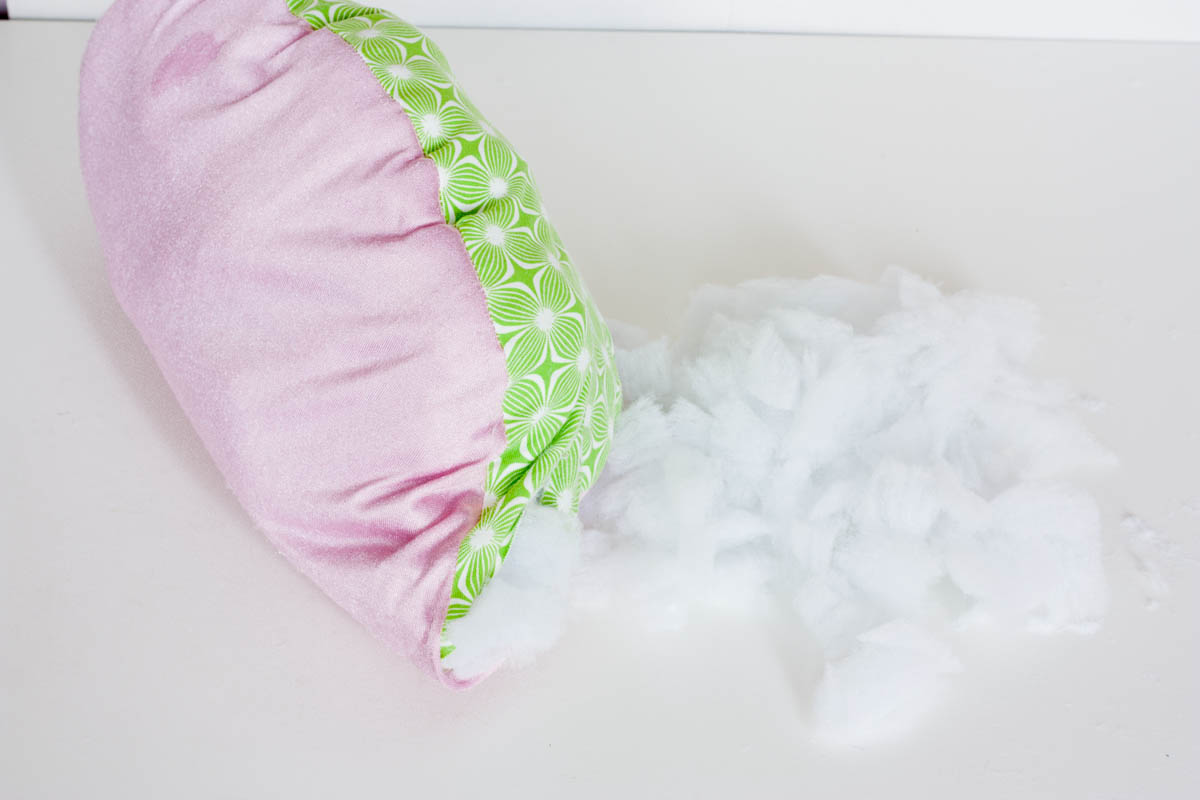
v. Using the hole merely left, turn your shape right way round and get-go stuffing it. Try to place more filling towards the green textile, which is the largest part, and and so motion upwards.
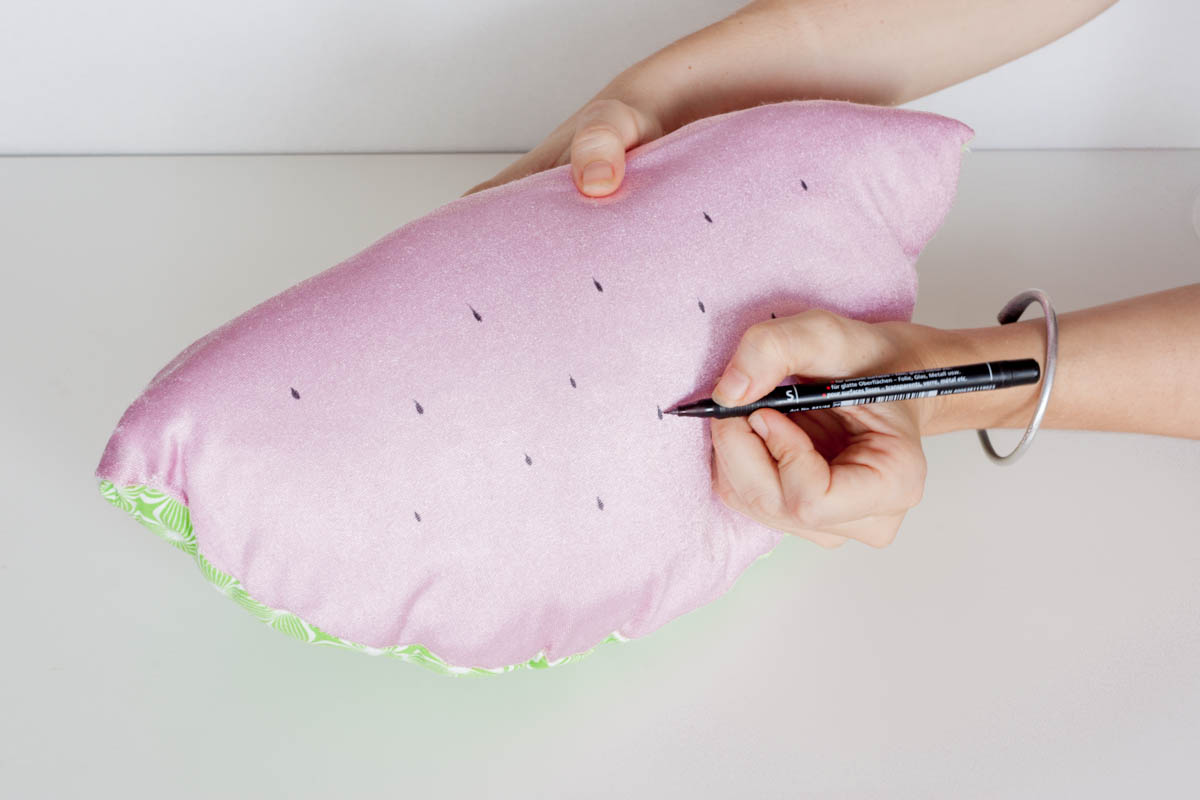
6. When the absorber is full and you're happy with the shape, hand stitch the open part.

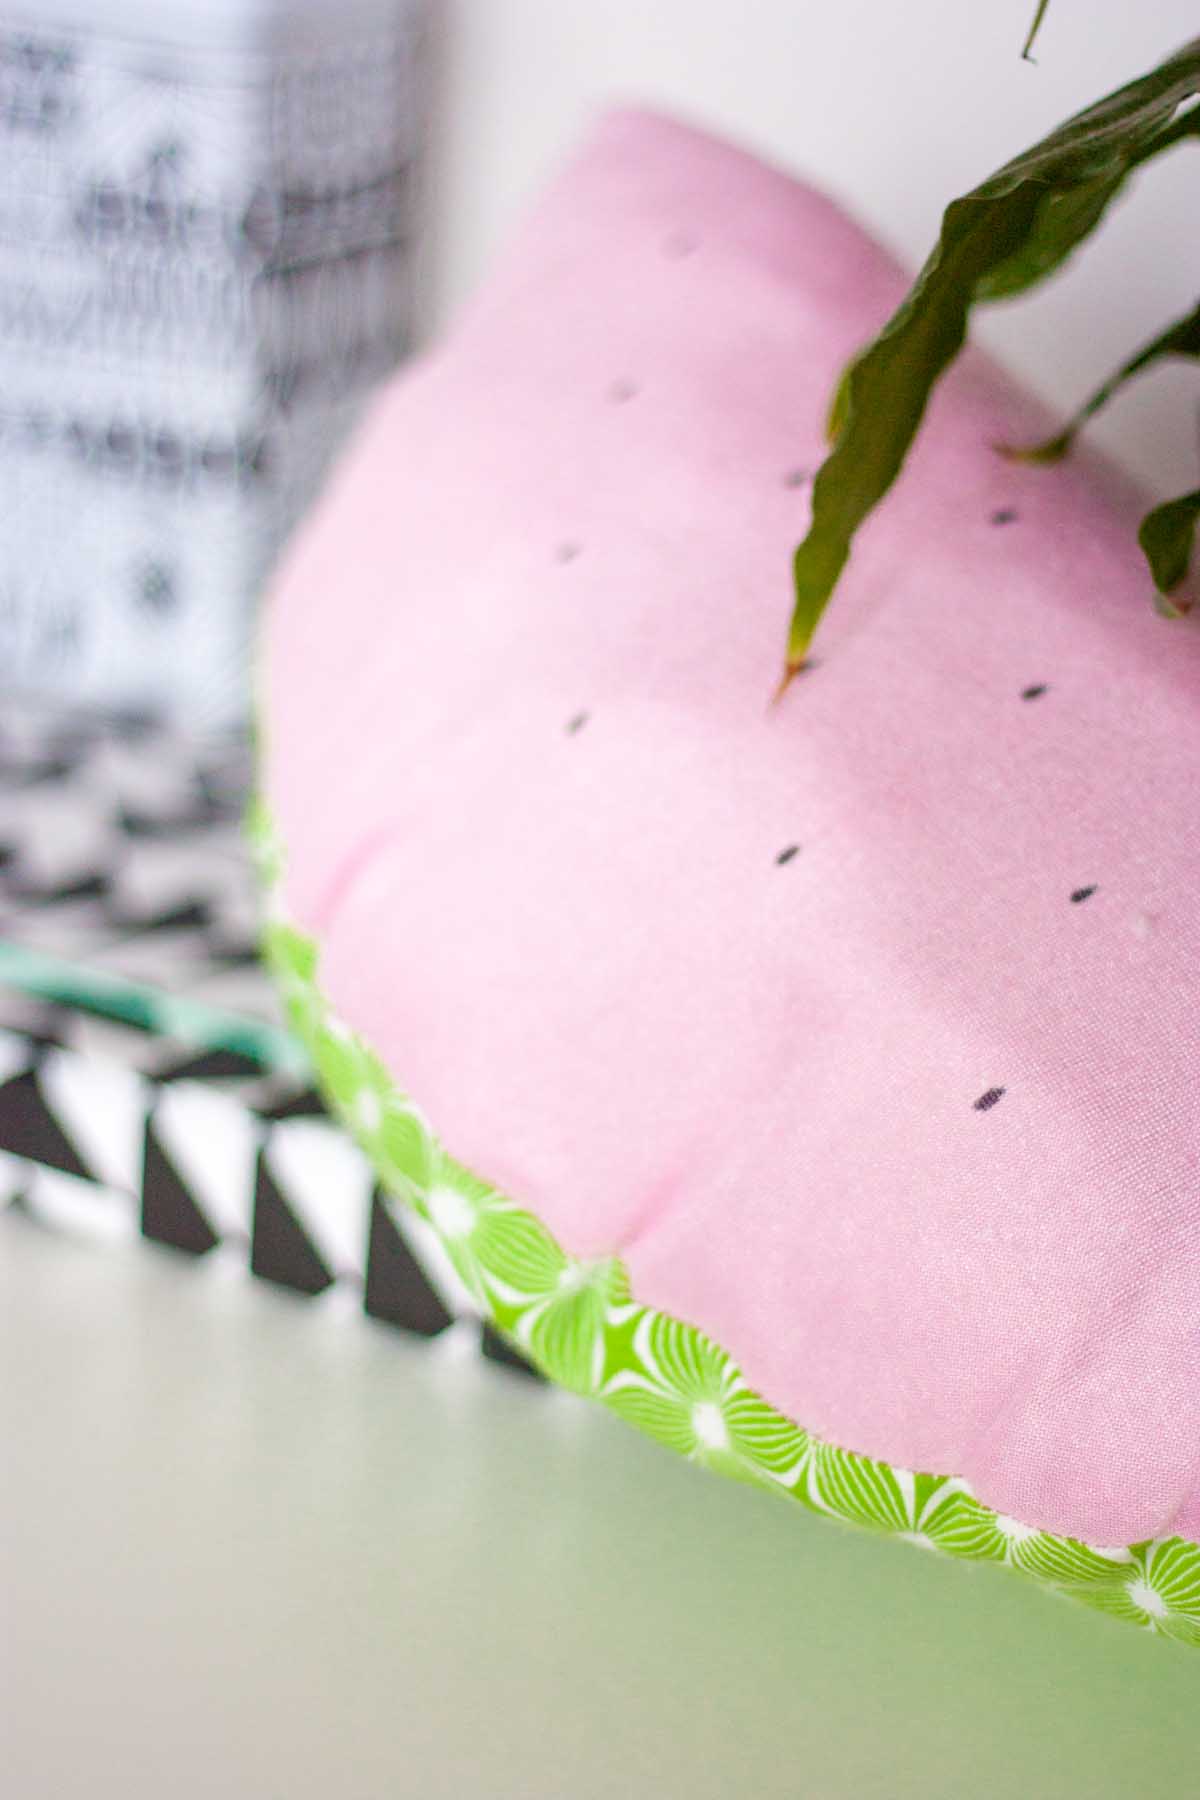
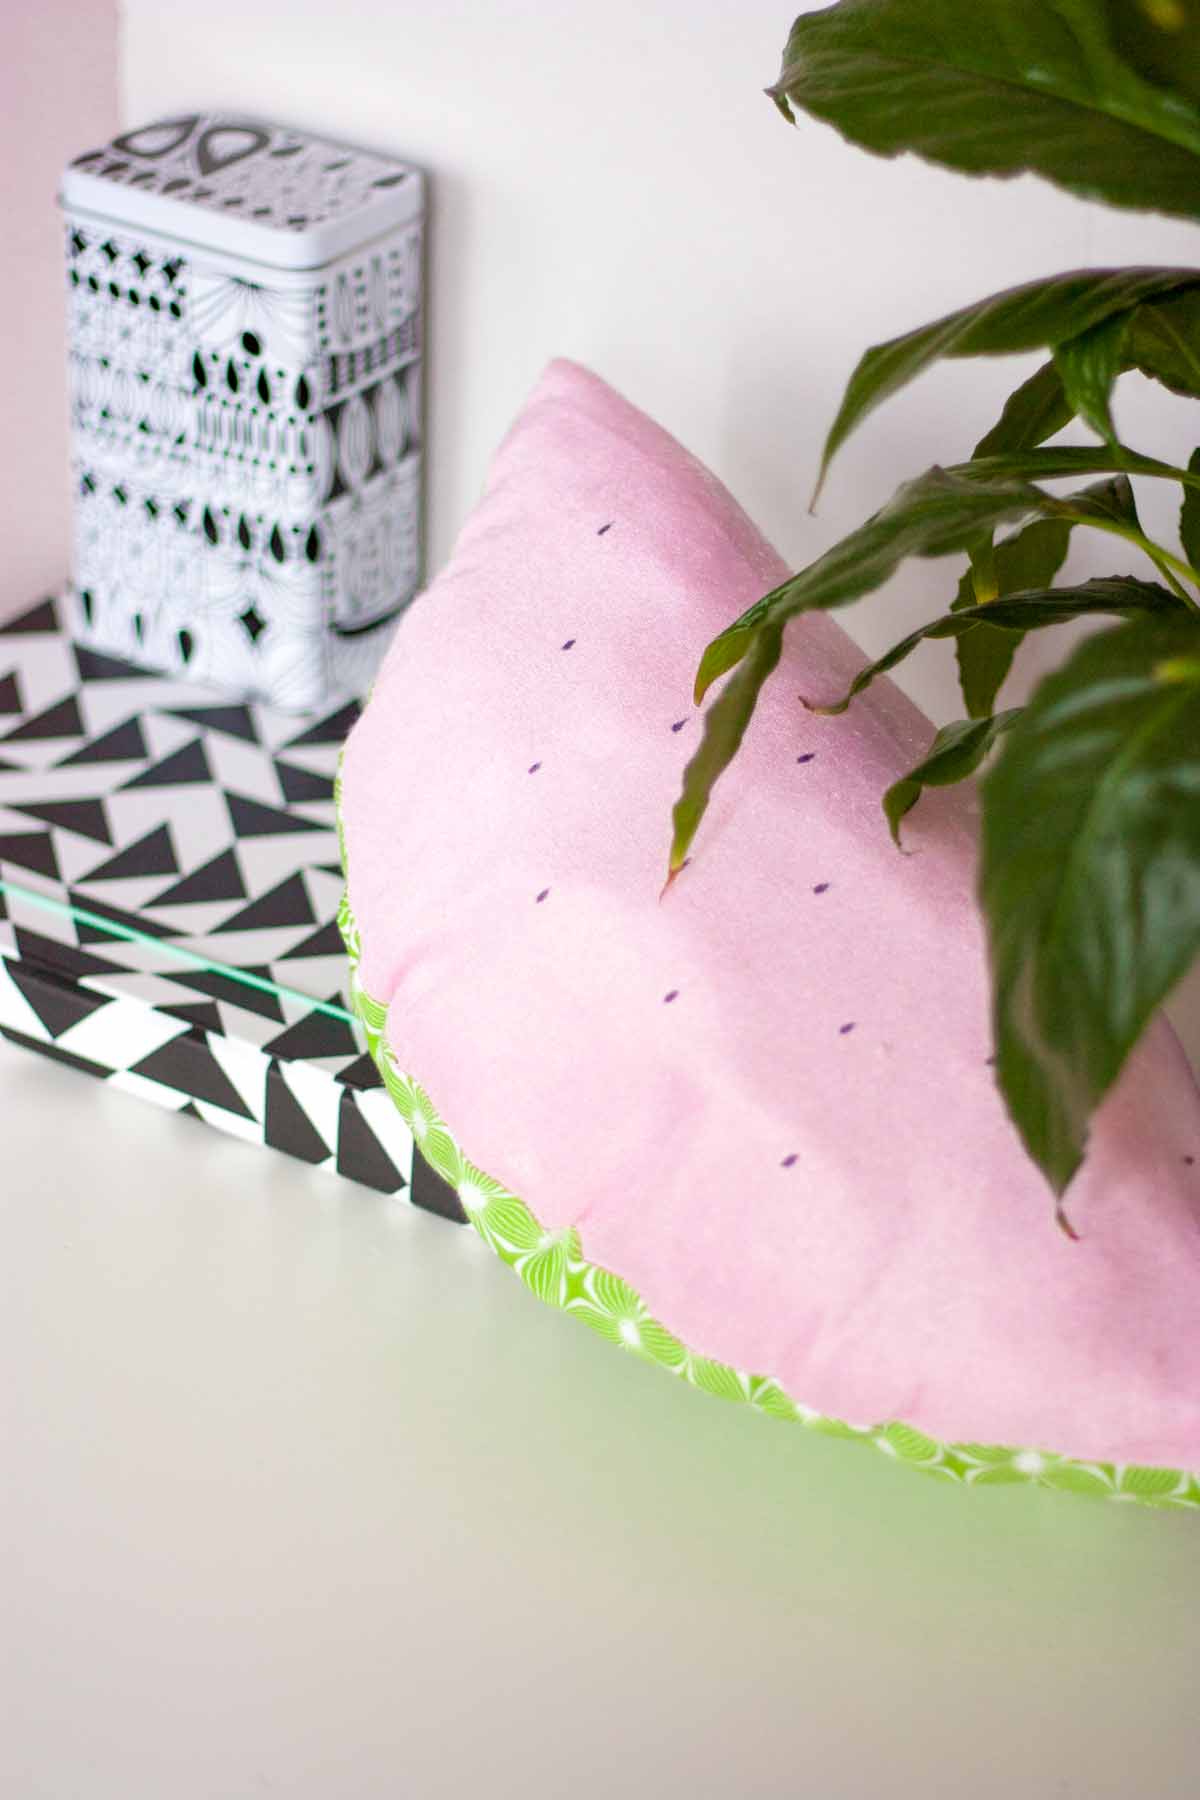
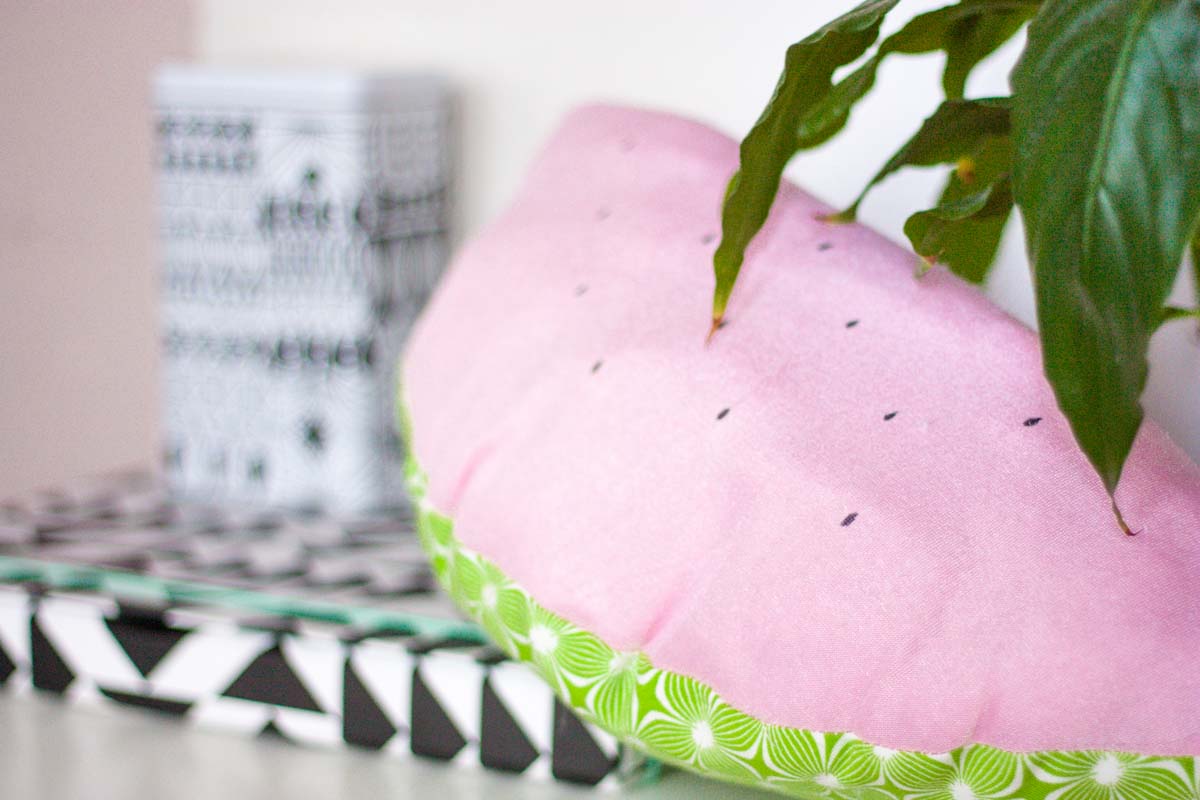
7. Finally, describe the seeds on the pink part using a black marker.
Well done! Who doesn't honey watermelon annihilation in summer?

Source: https://www.diys.com/watermelon-throw-pillow/
Post a Comment for "How To Make A Watermelon Throw Pillow"